How to Manage Customer Deposits, Credits, and Refund Balances Using Customer Wallets
Learn how to track advance customer deposits, available balances, and refund transactions using the Customer Wallet feature.
Step-by-Step Process
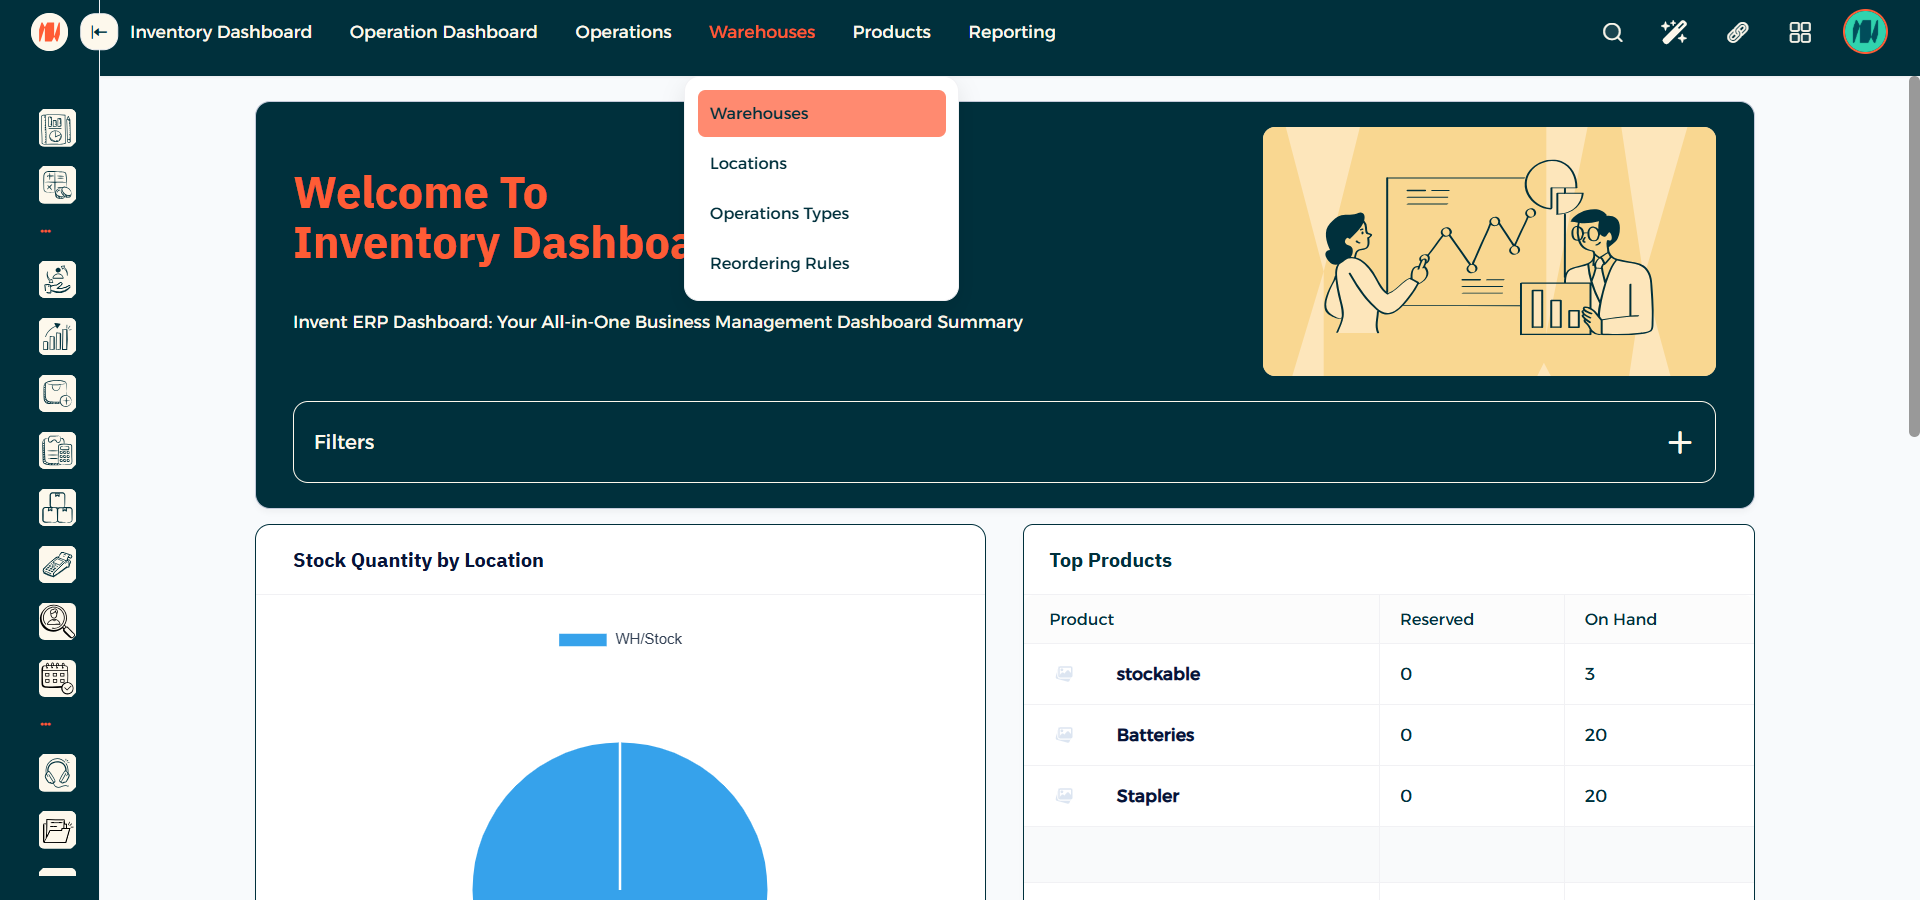
Step 1: Navigate to All Apps
From the Main Menu, click on All Apps.
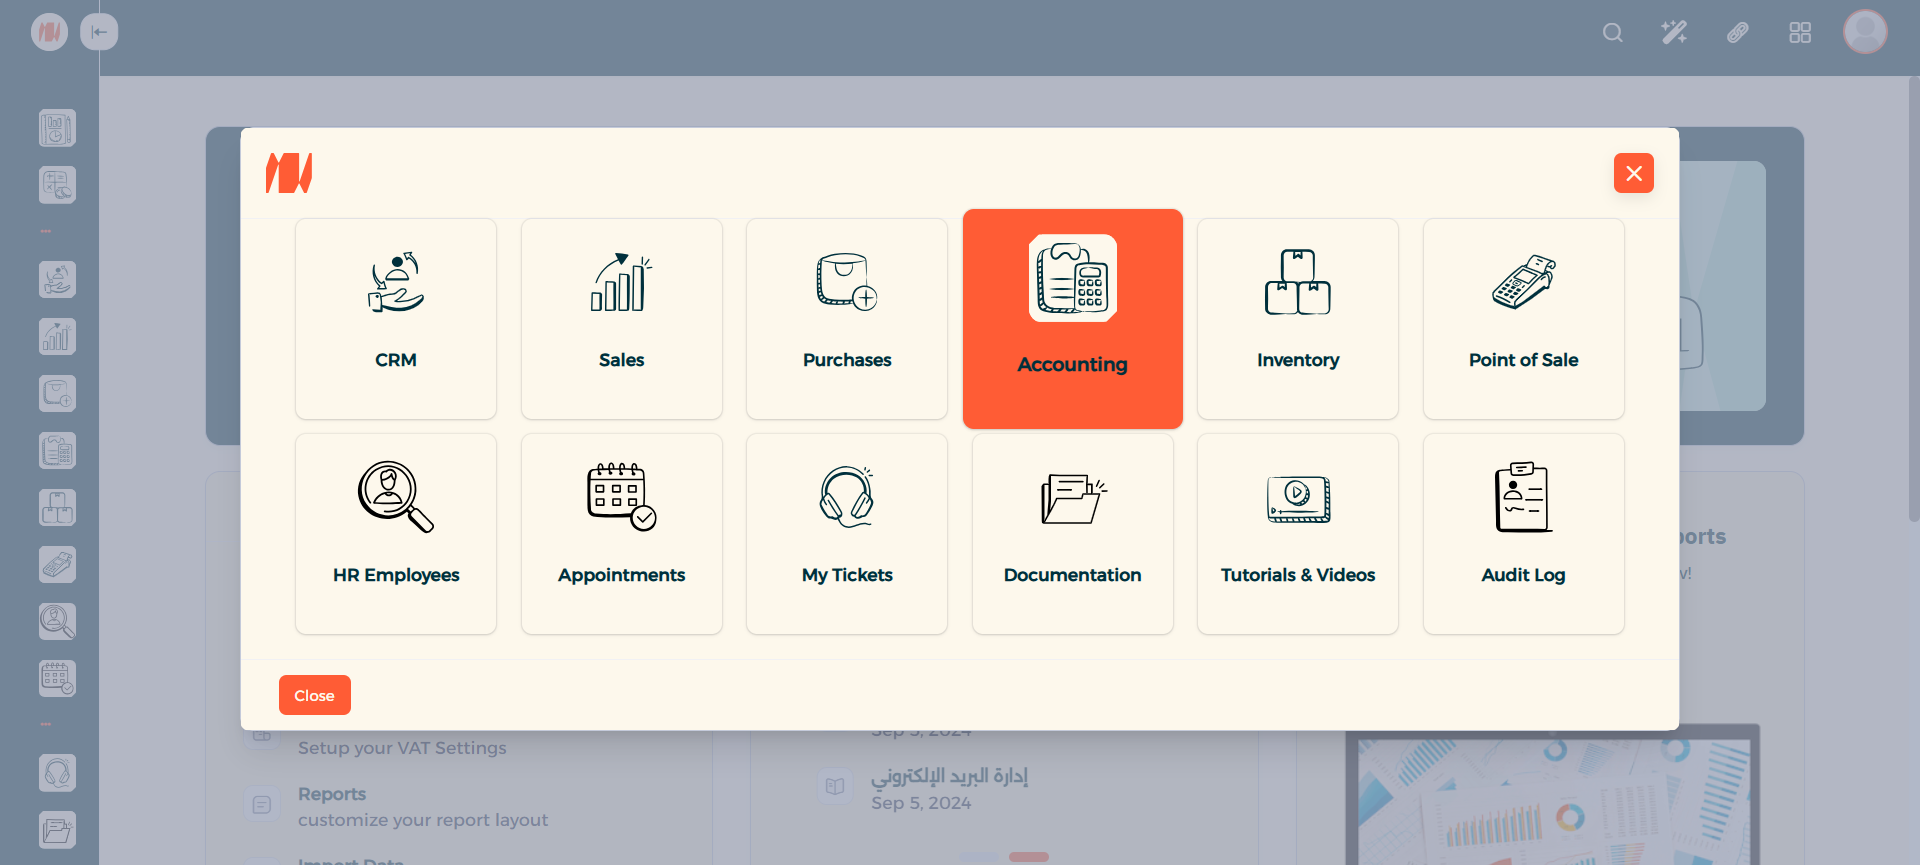
Step 2: Select Accounting
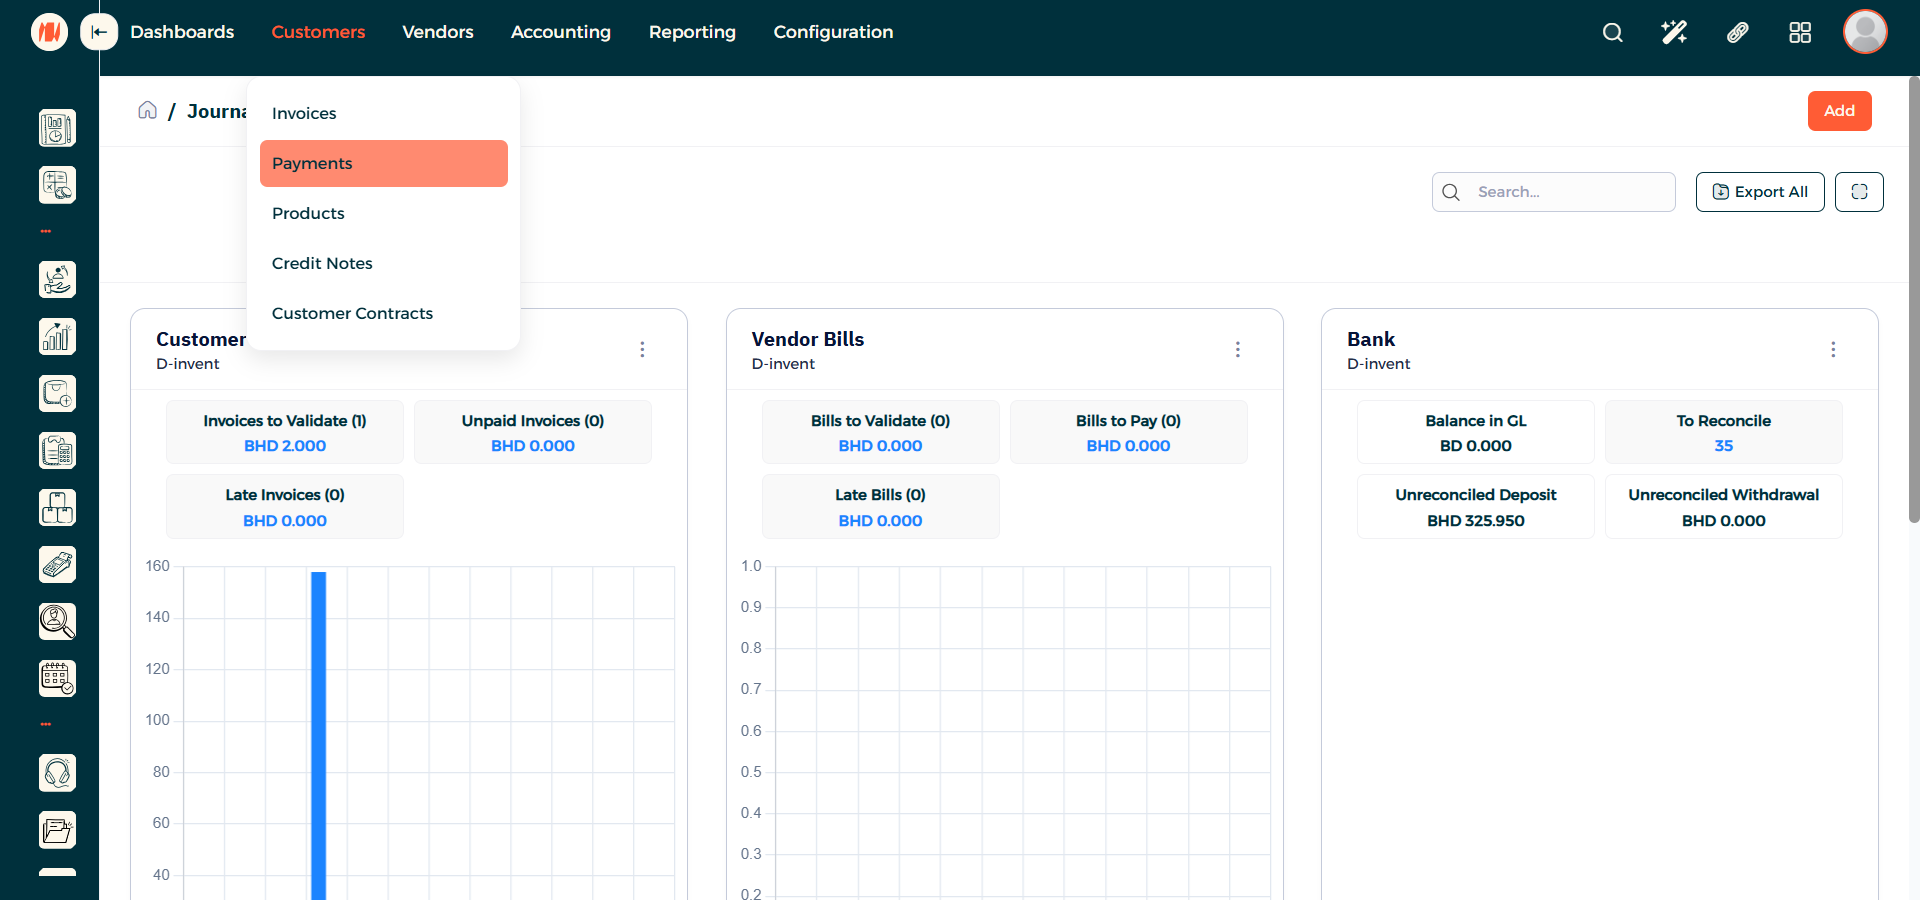
Step 3: Go to Customers then Payments
Click on Customers then under that click on Payments.
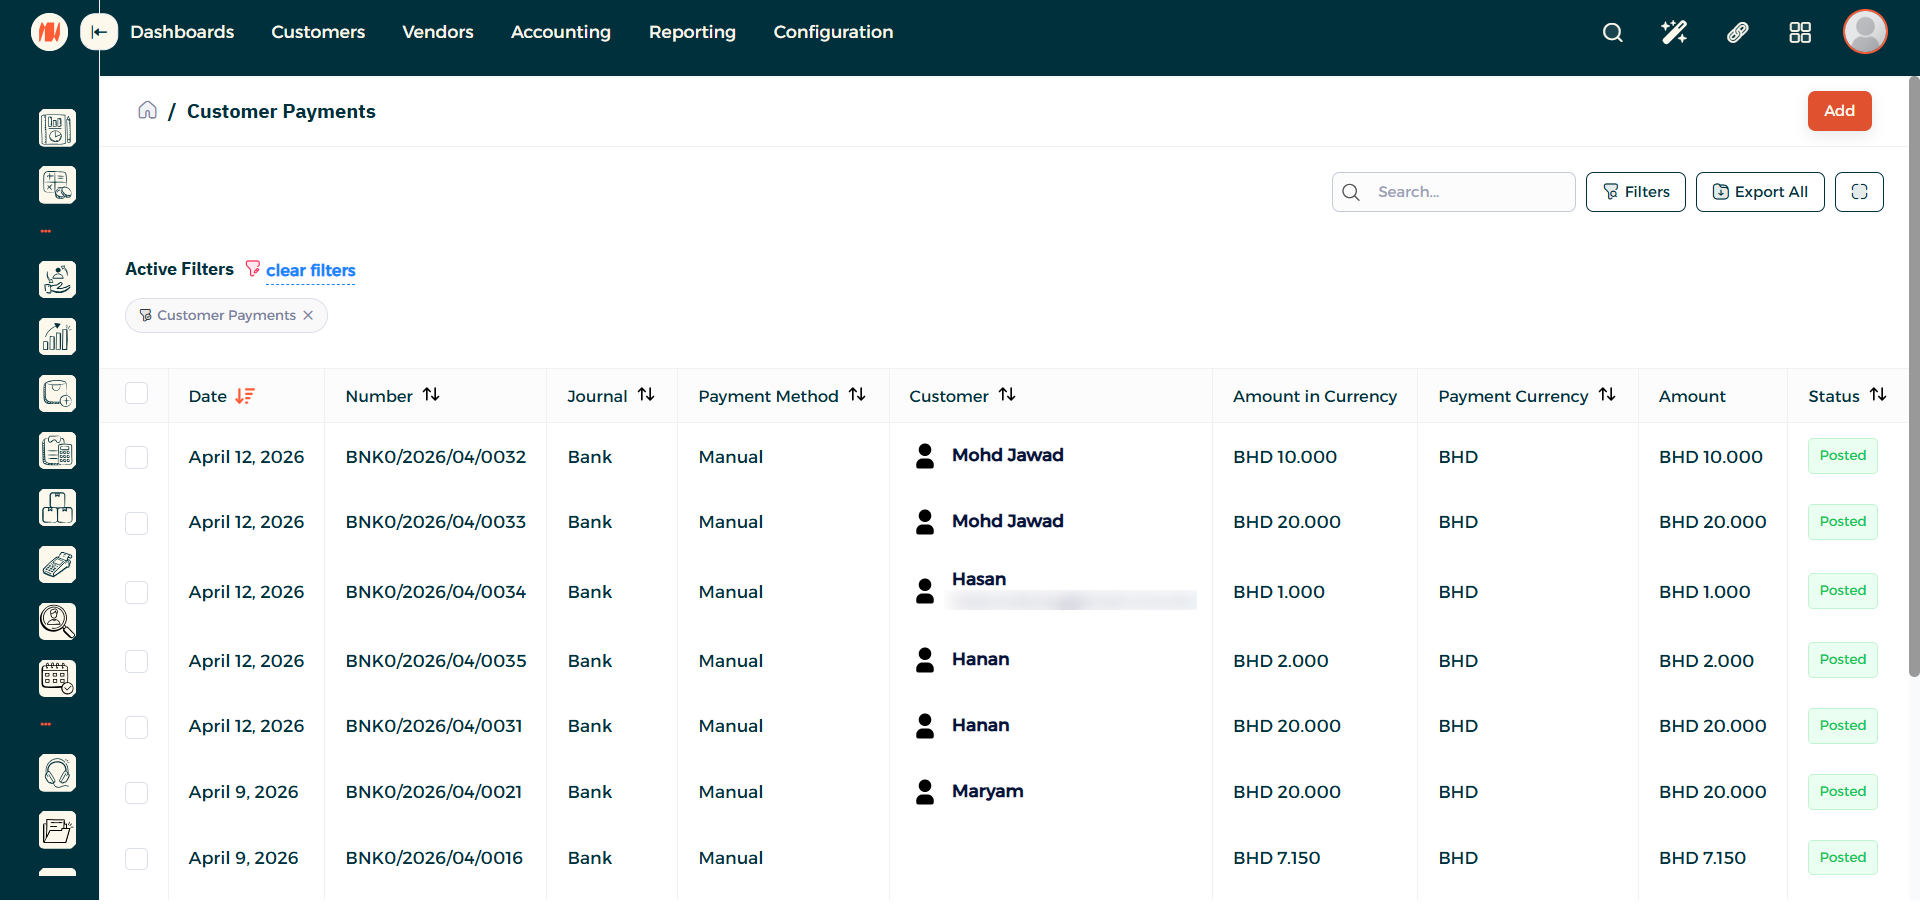
Step 4: Add New Payment
On the top right corner press on add.
Step 5: Select Payment Type
Select the payment type as receive payment.
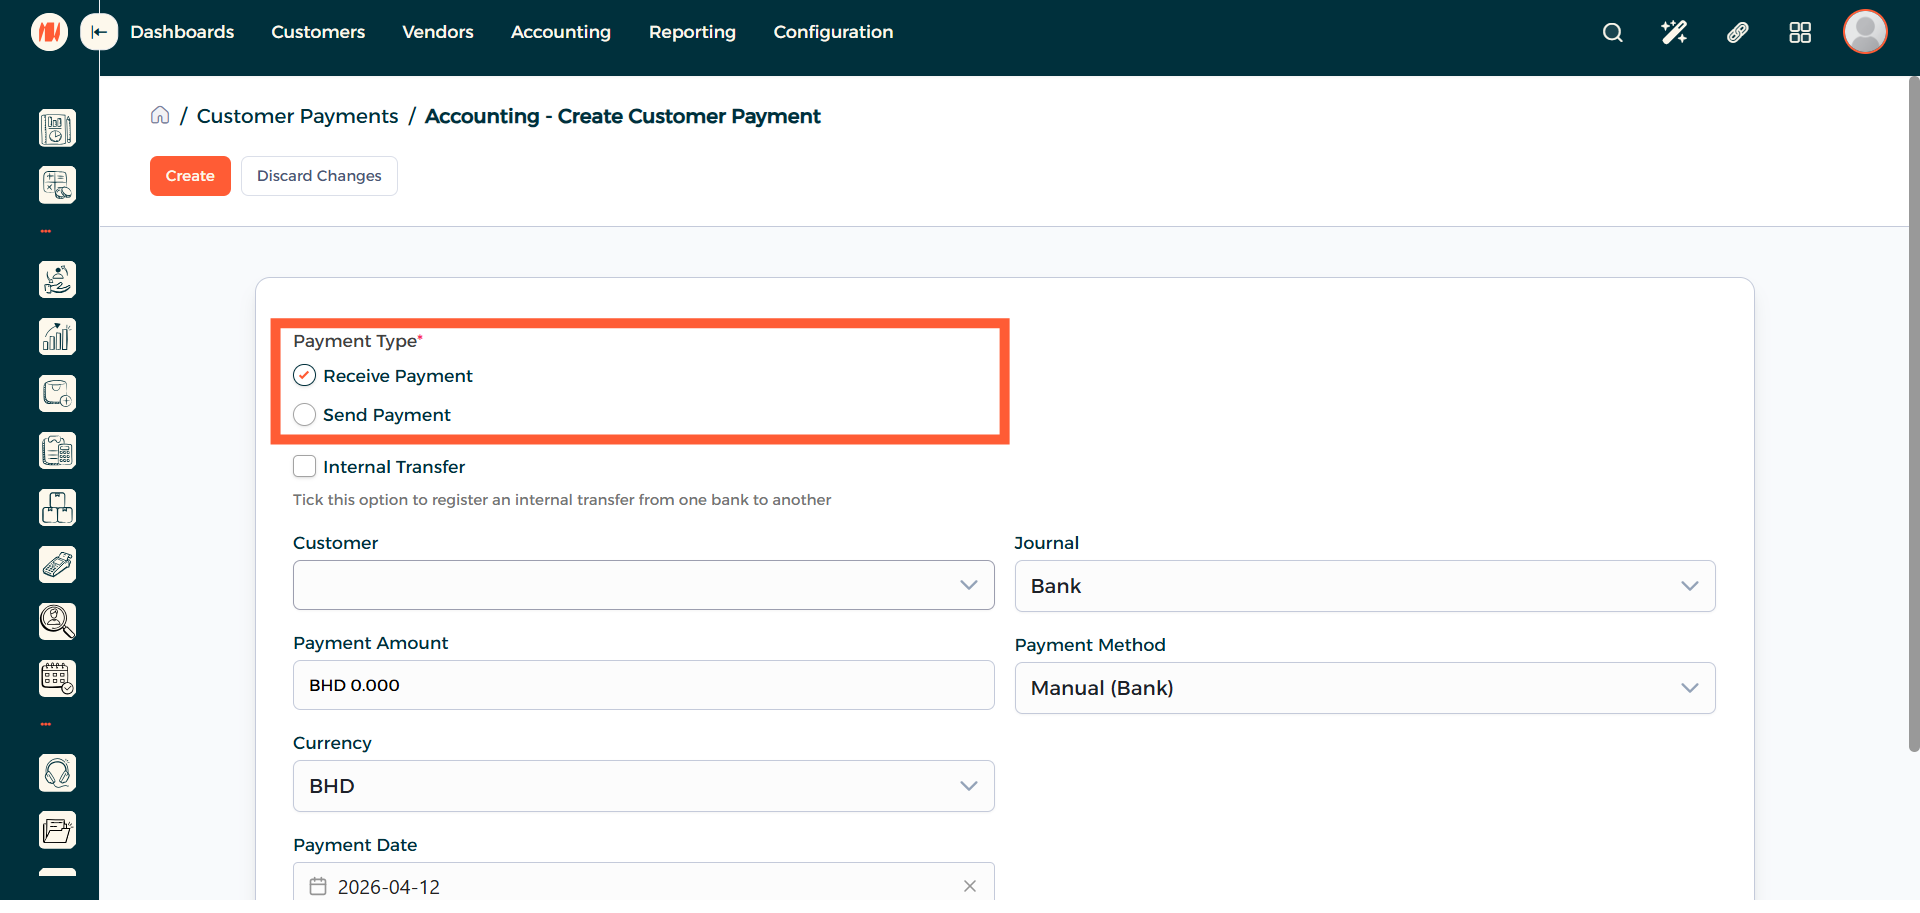
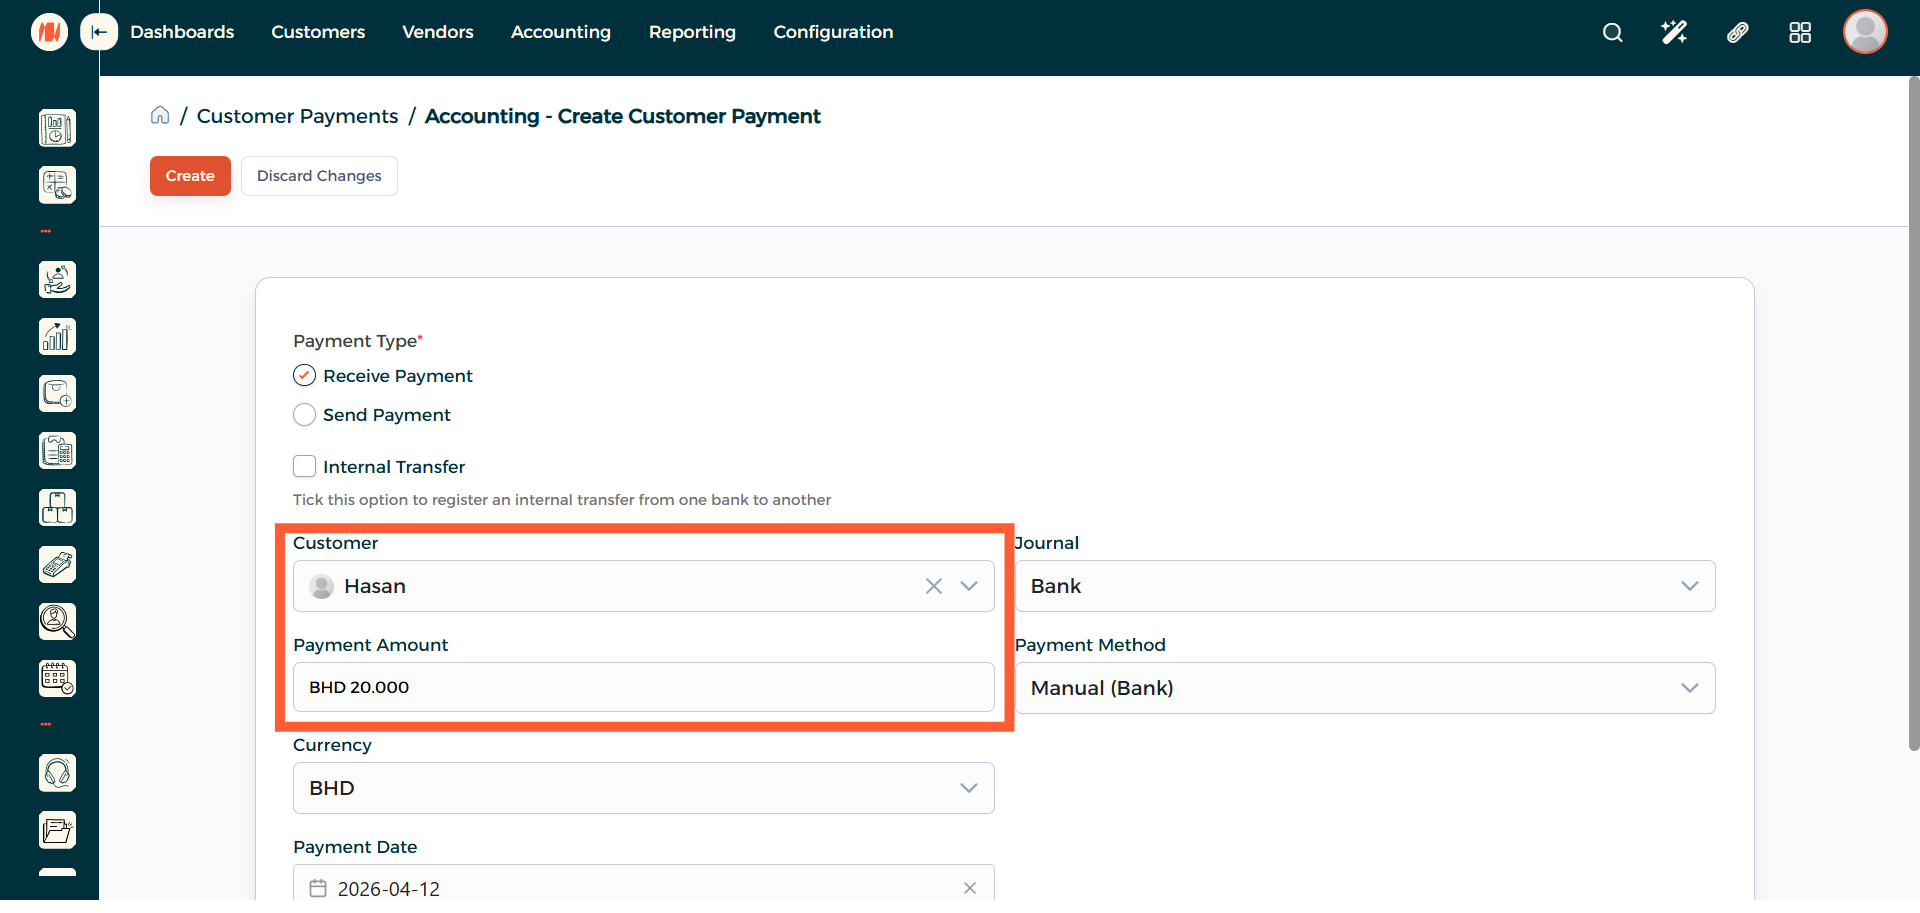
Step 6: Fill out Customer Payment
Choose the Customer alongside the Payment Amount. After that click on Create.
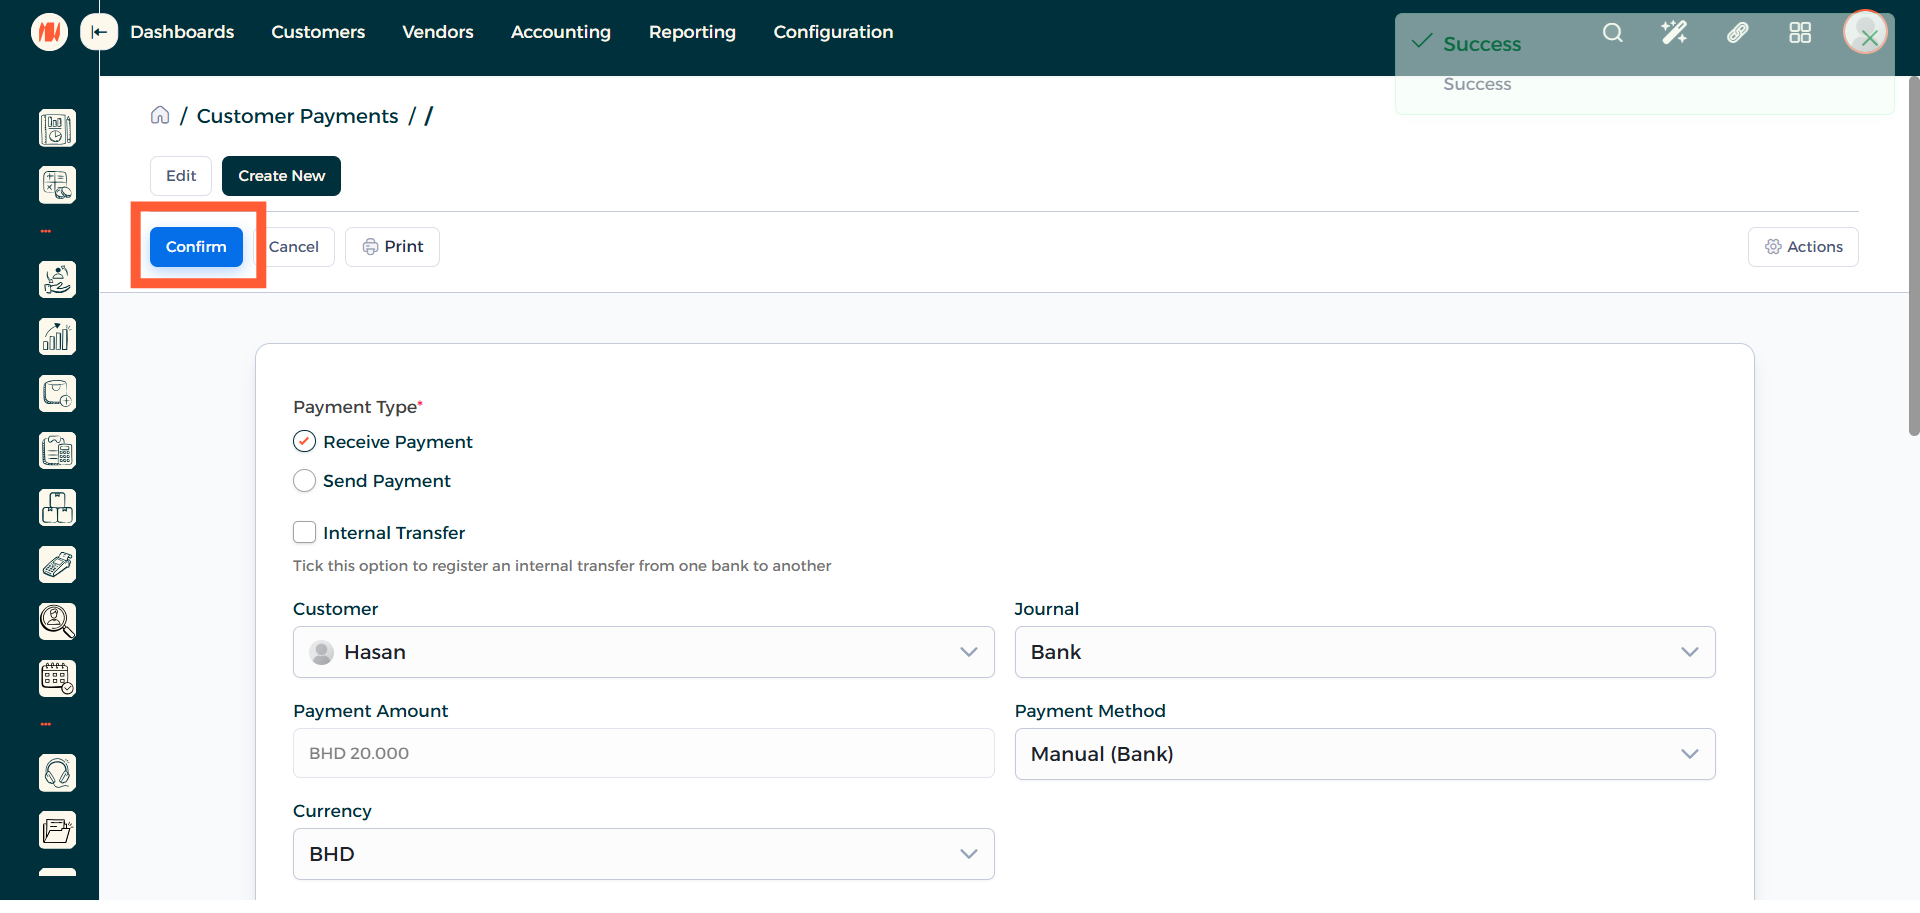
Step 7: Confirm Customer Payment
Step 8: Head to Point of Sale
After that click on All Apps then head to Point of Sale.
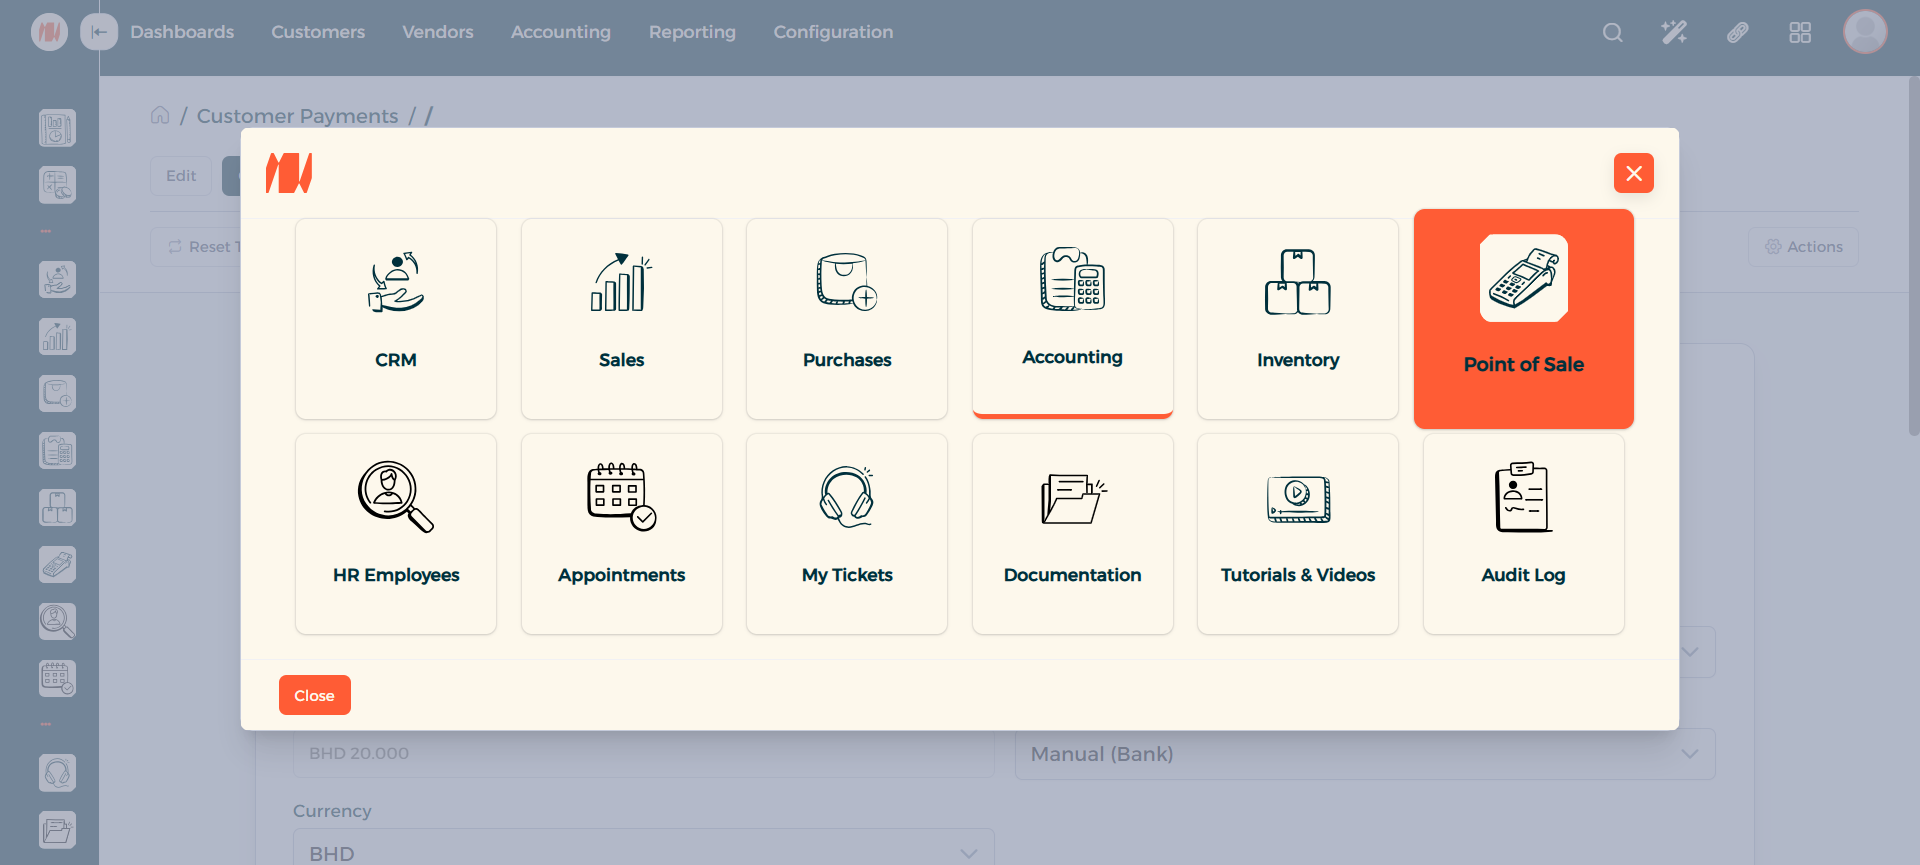
Step 9: Start New POS Session
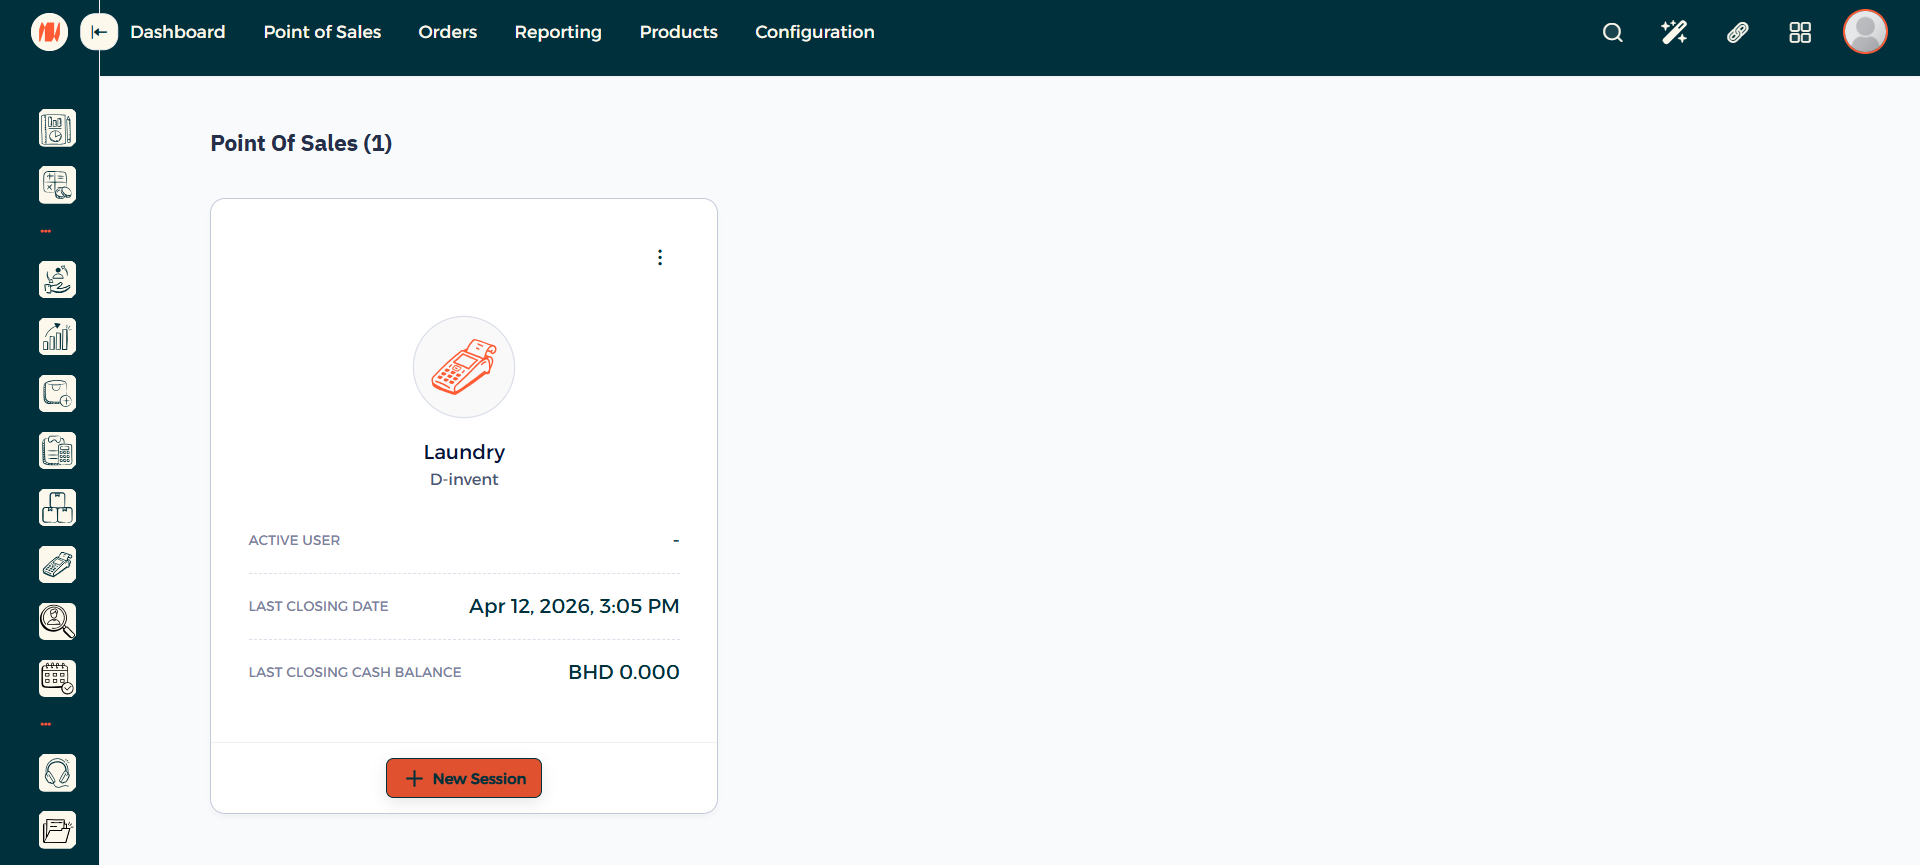
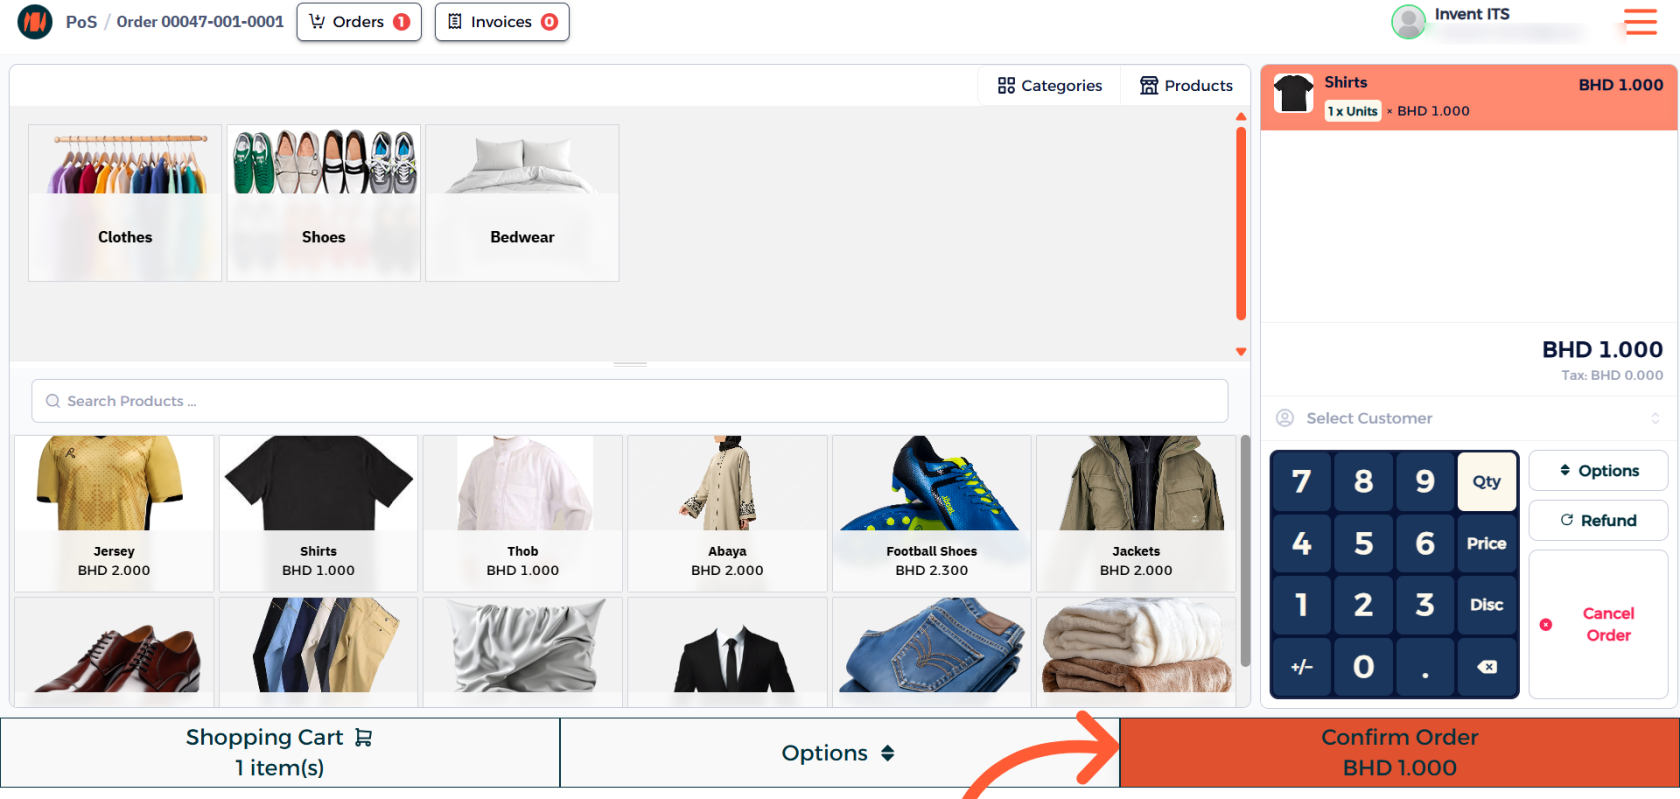
Step 10: Select Product and Confirm Order
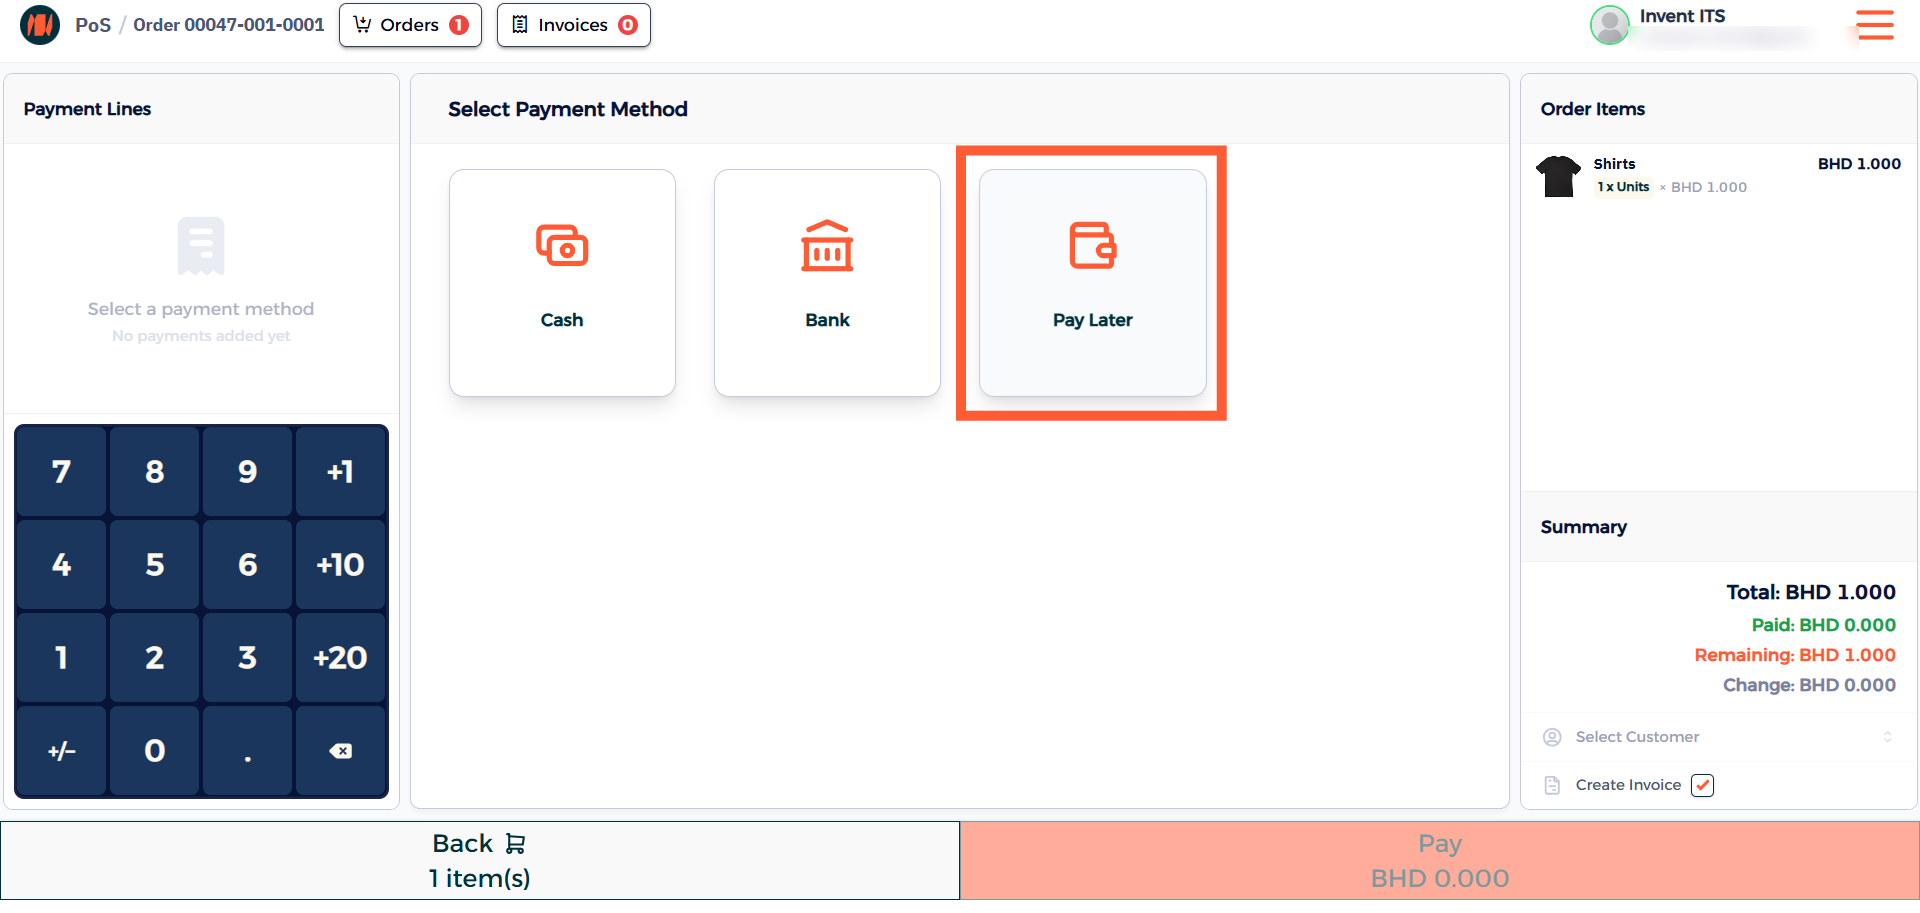
Step 11: Select Payment Method
Choose the Pay Later option from the payment methods. Then complete the order.
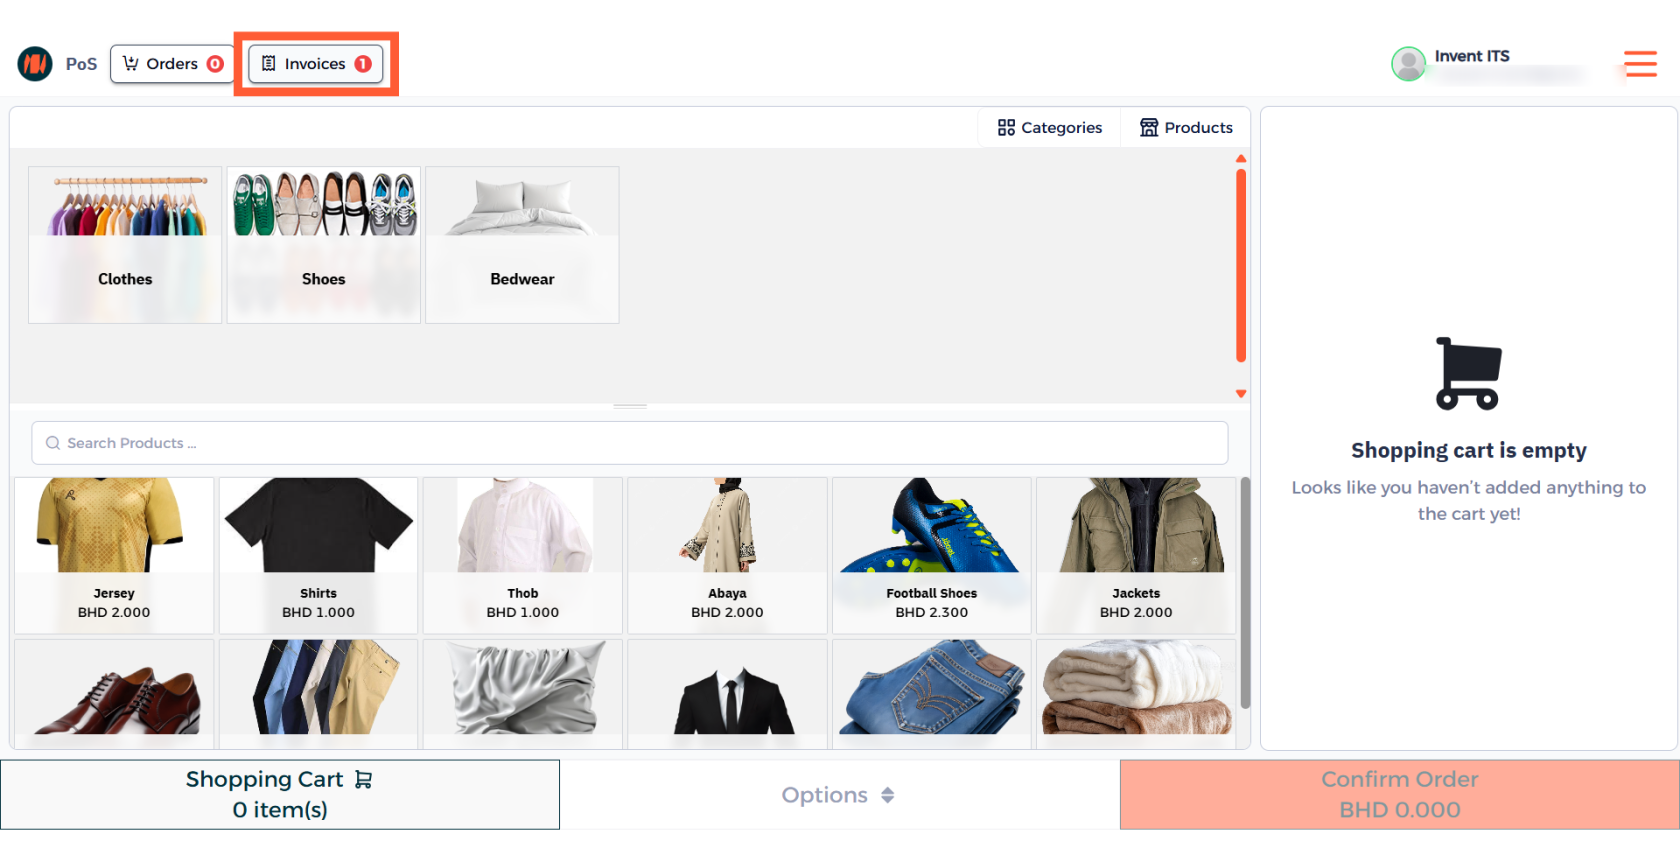
Step 12: Navigate to Invoices
After the order is complete, head over to invoices.
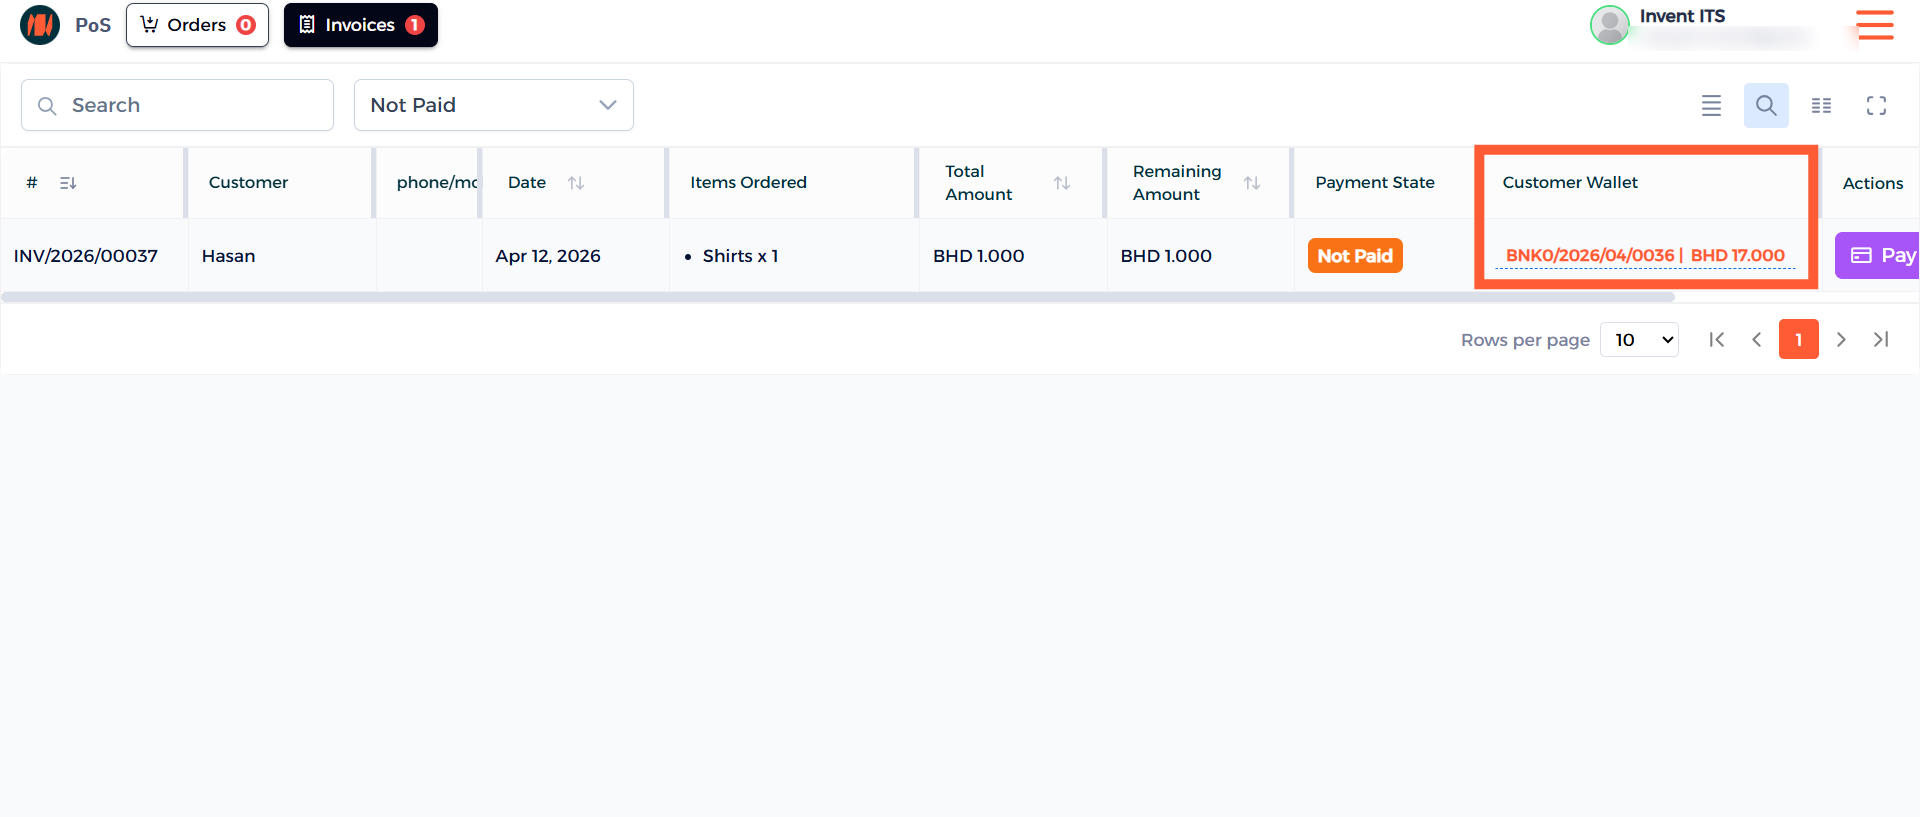
Step 13: Customer Wallet
Here you can see the Customer Wallet section alongside the balance in your invoices page. Click on it to allocate the funds to complete the purchase.
Another Method
Step 1: Navigate to Accounting
From the Main Menu, look at the top right corner then click on *All apps. After that click on Accounting.
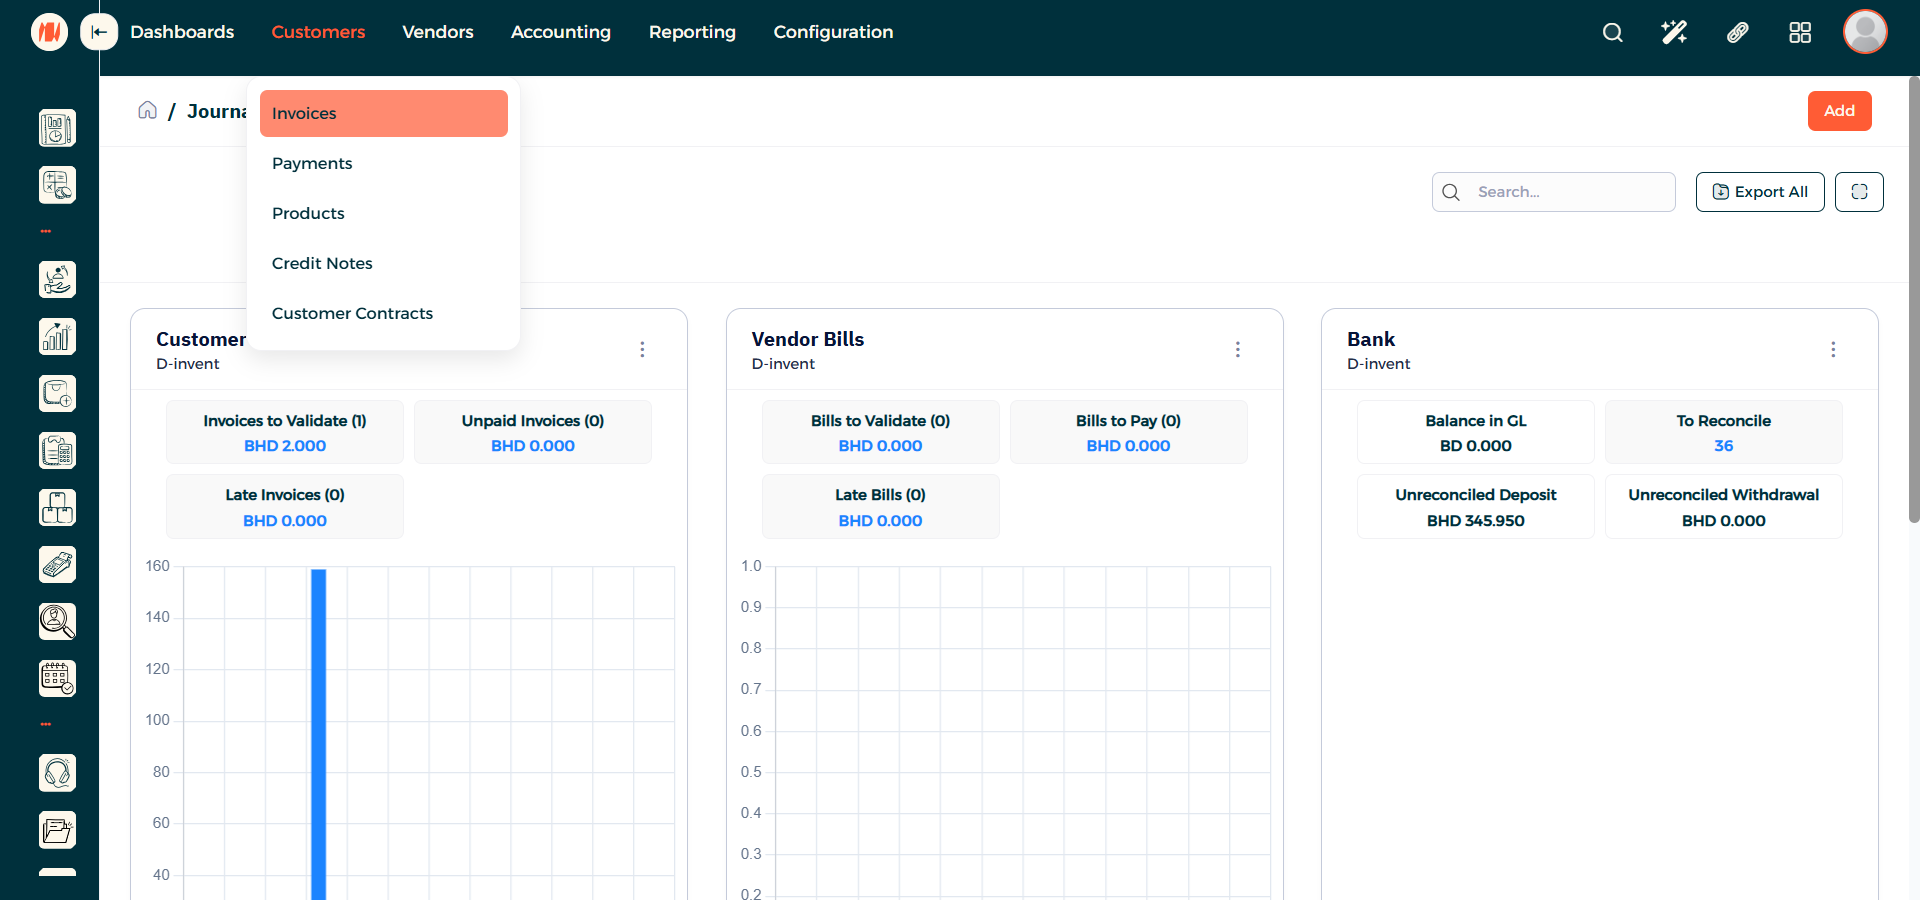
Step 2 : Go to Customers then invoices
Click on Customers then under that click on Invoices.
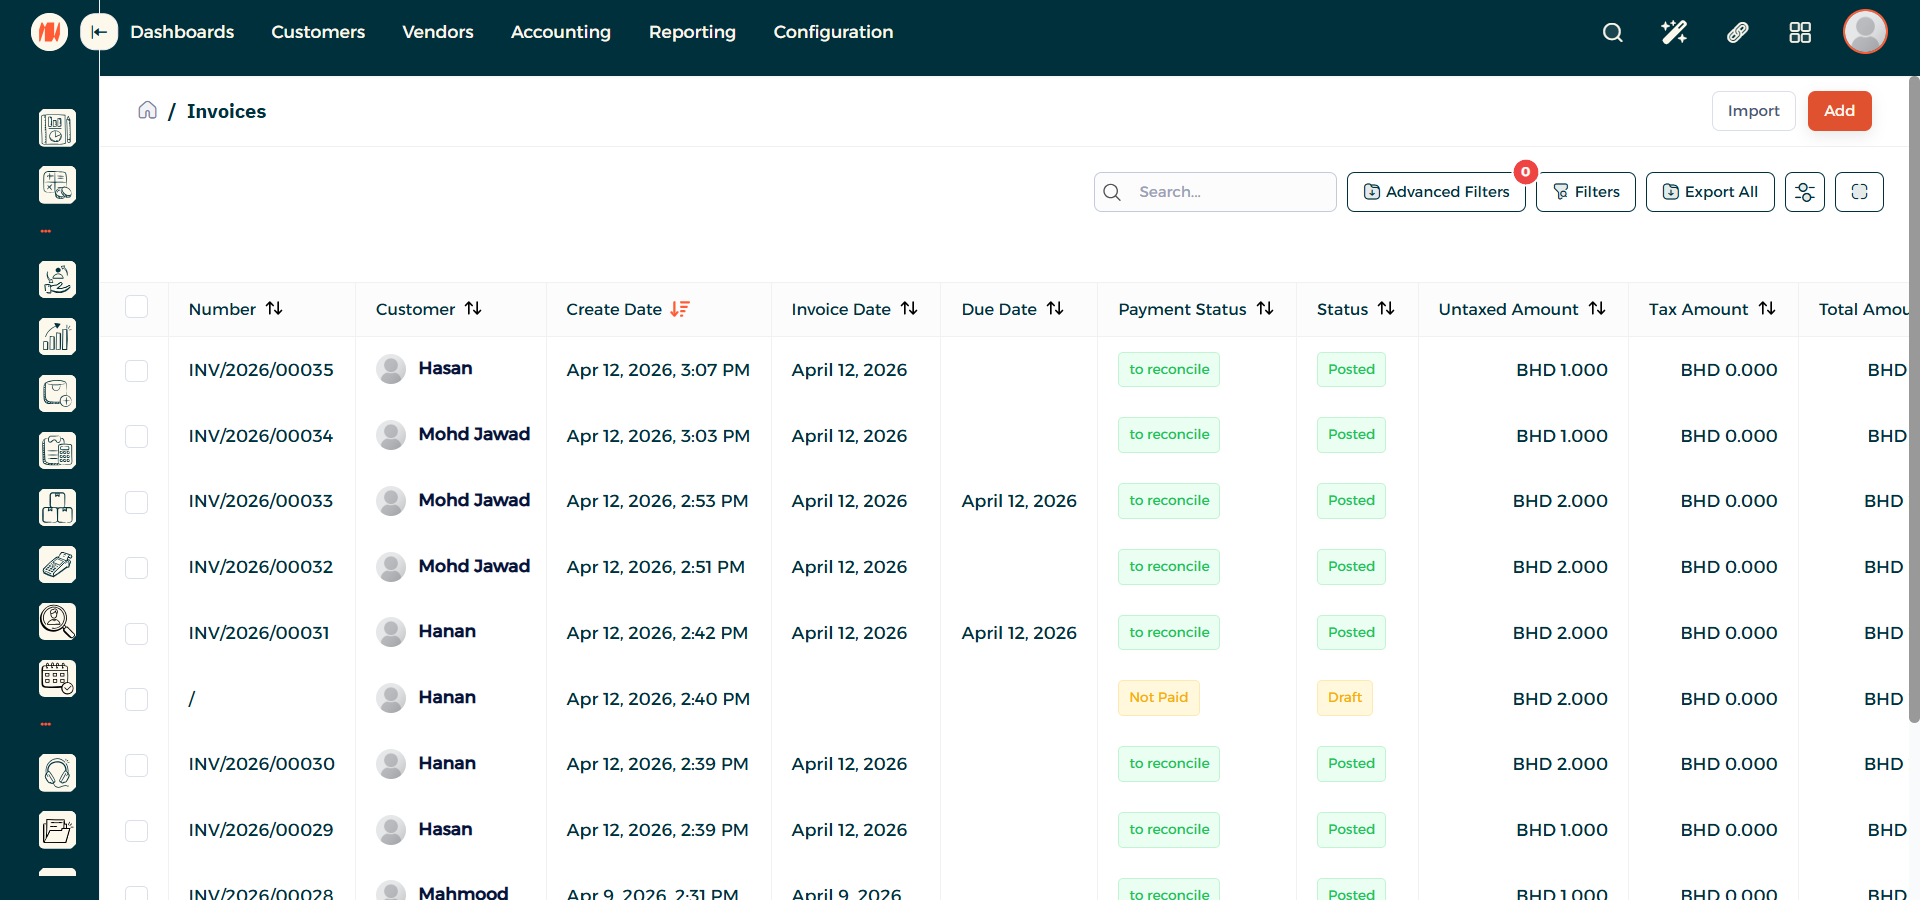
Step 3: Add an Invoice
On the top right corner you can see the Add button, click on it.
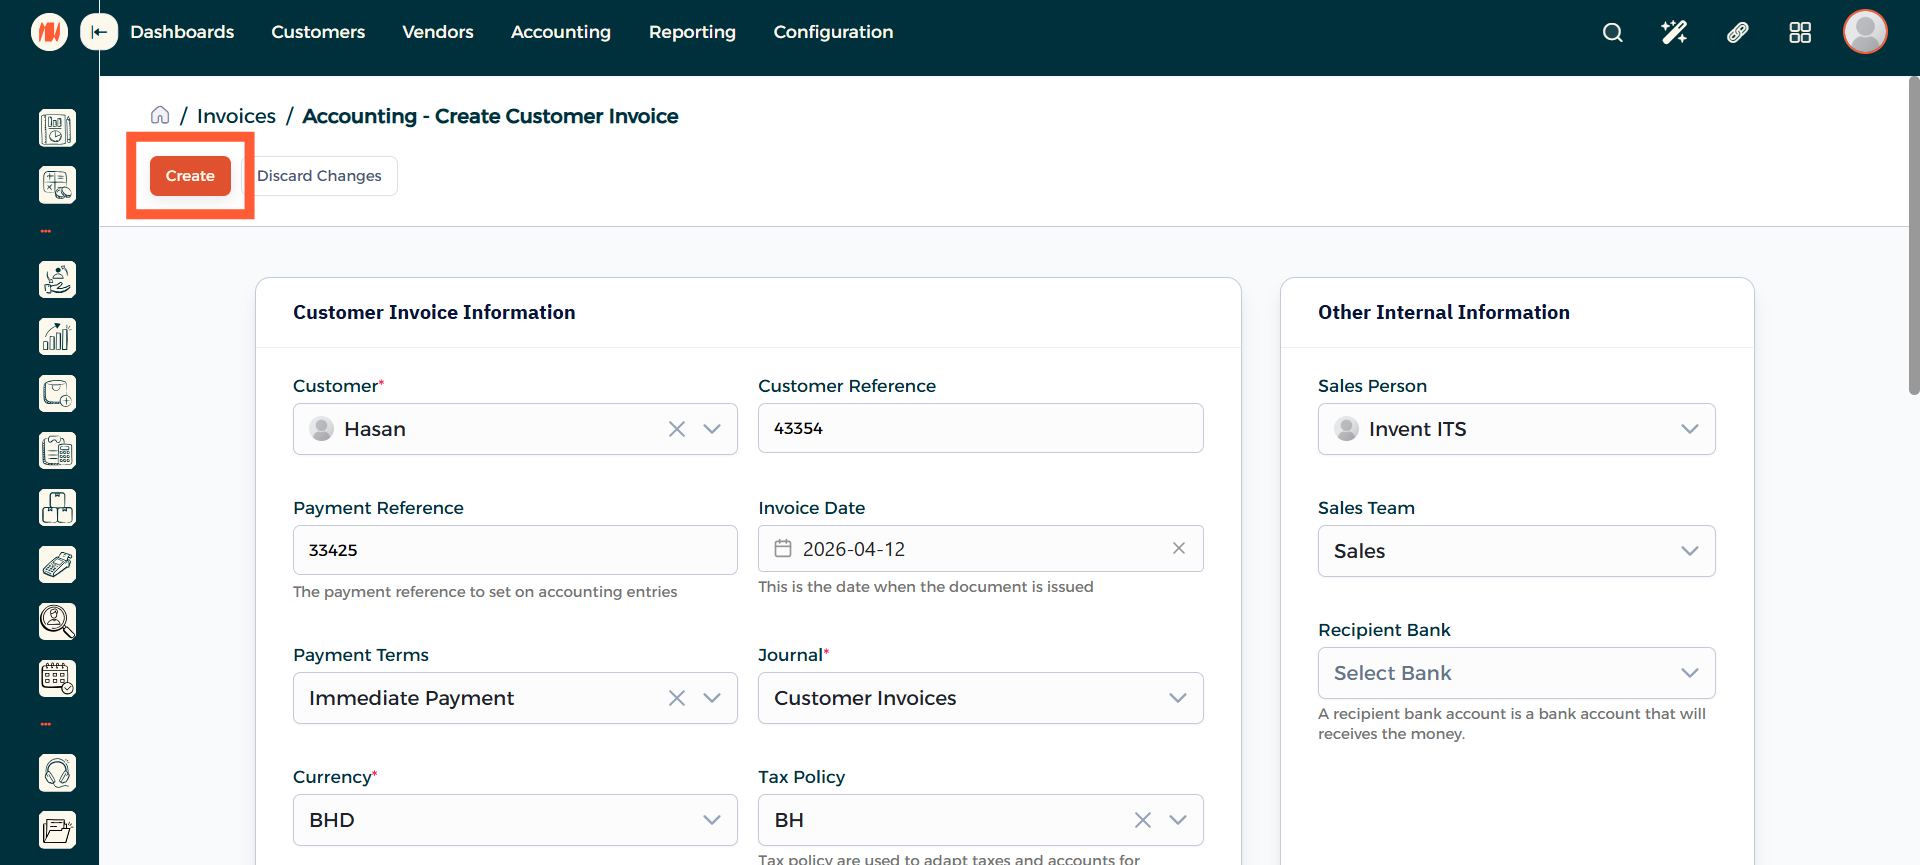
Step 4: Create Customer Invoice
Here select the Customer and then fill out all the details. After that scroll down choose a Product and then the final step is to press Create.
Step 5: Confirm Invoice
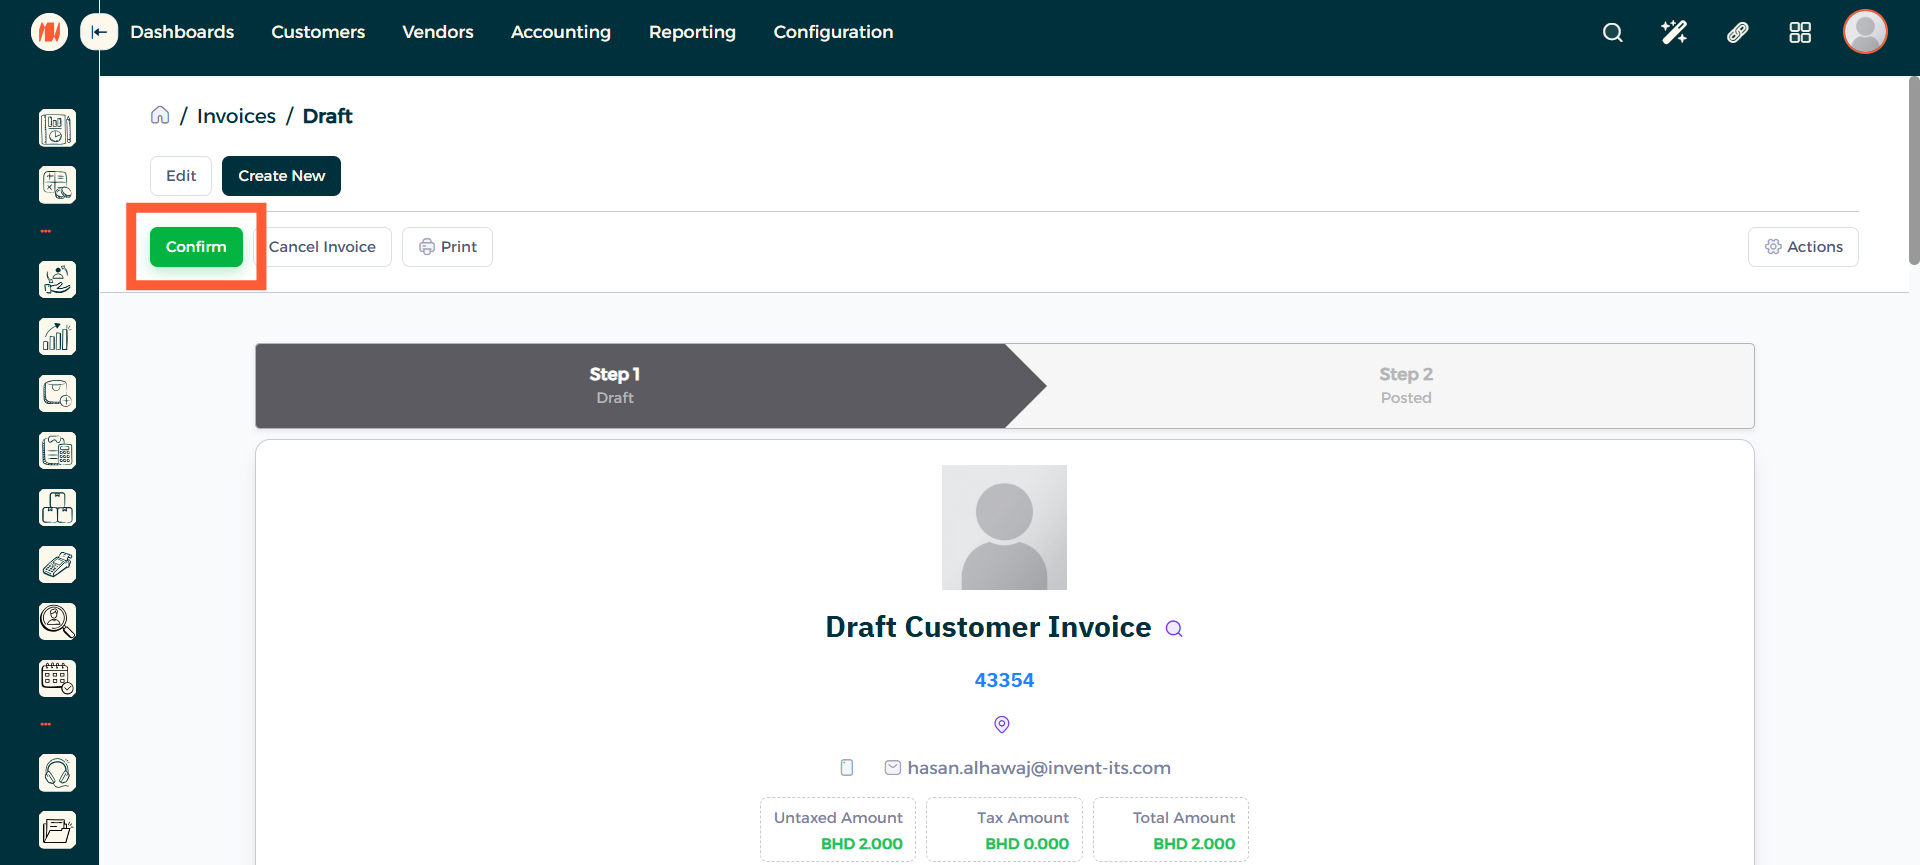
Step 6: Use Customer Wallet
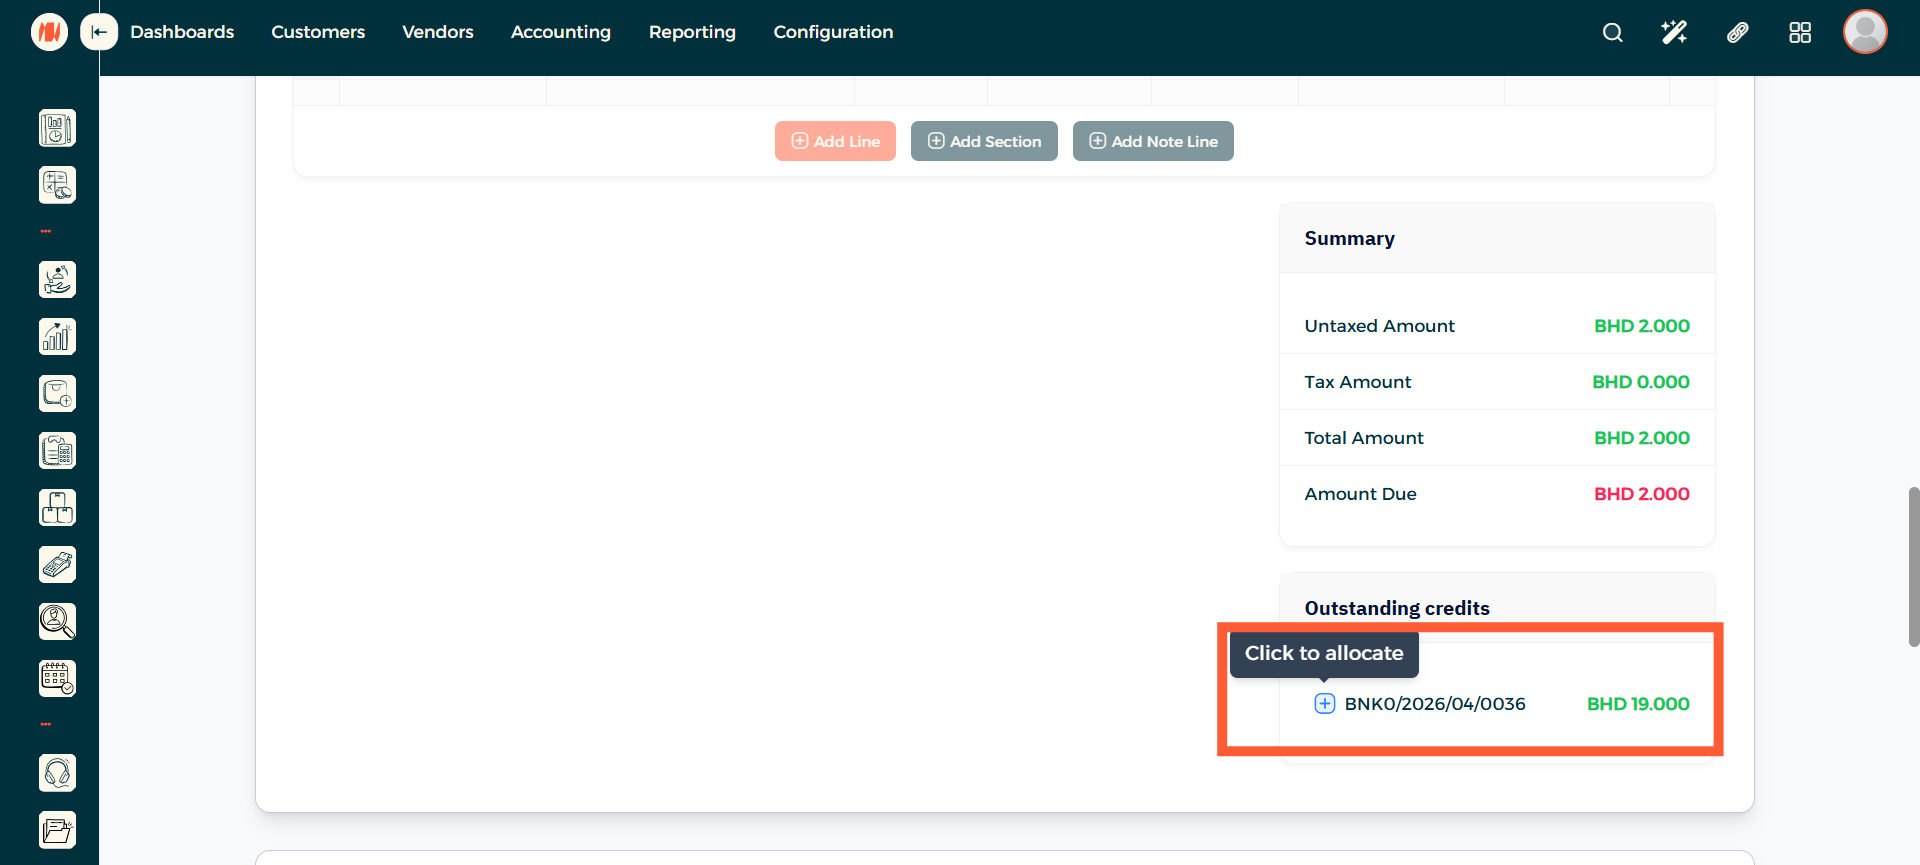
After confirming the invoice, scroll down and see the Customer Wallet. Press on the small blue icon allocate the funds and complete the order.
Notes & Tips
- Always verify the customer’s wallet balance and contact details before adding or using funds. Accurate information allows for a smooth business workflow alongside avoiding issues.
FAQ
Q: Why should we use the Customer Wallet feature? It lets customers store prepaid credit for instant checkout, streamlines refunds and store-credit handling, and encourages repeat purchases.
Q: Are there limits on the customer wallet balance? There is no limit to the customer wallet balance.